
How to Create a Distribution List in Gmail?
Are you fed up with adding the same email addresses each time you wish to communicate with a group? With only a few clicks, you can easily reach a large number of people by creating a distribution list in Gmail! This feature keeps your correspondence structured and lets you email everyone at once with a few clicks, whether you’re updating a team, family, or group of friends. This tutorial will walk you through the easy process of creating a distribution list in Gmail.
Create a Distribution List in Gmail
In Gmail, making a distribution list is easy. To rapidly set up and manage a list and make it simple to remain in touch with groups, follow these steps:
1.Open your Gmail account and log in: To log in, visit the Gmail website and enter your email address and password.
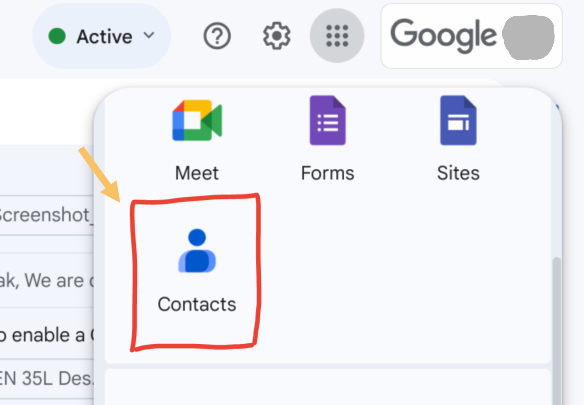
2.Choose Contacts: Choose “Contacts” from the list of apps after clicking the Google Apps icon in Gmail’s upper-right corner.
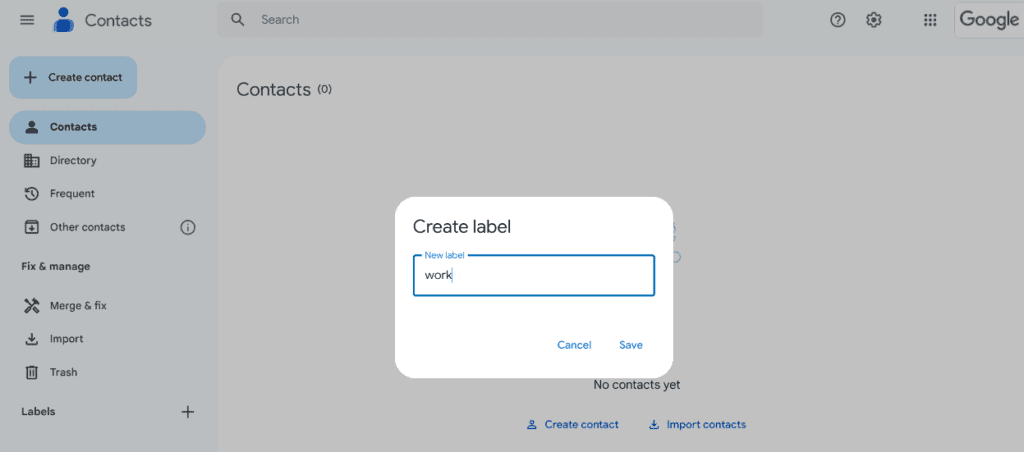
3.Make a New Label: Select “Create label” from the menu on the left side of the Contacts page. Click “Save” after giving the label a name (such as “Family,” “Work,” etc.).
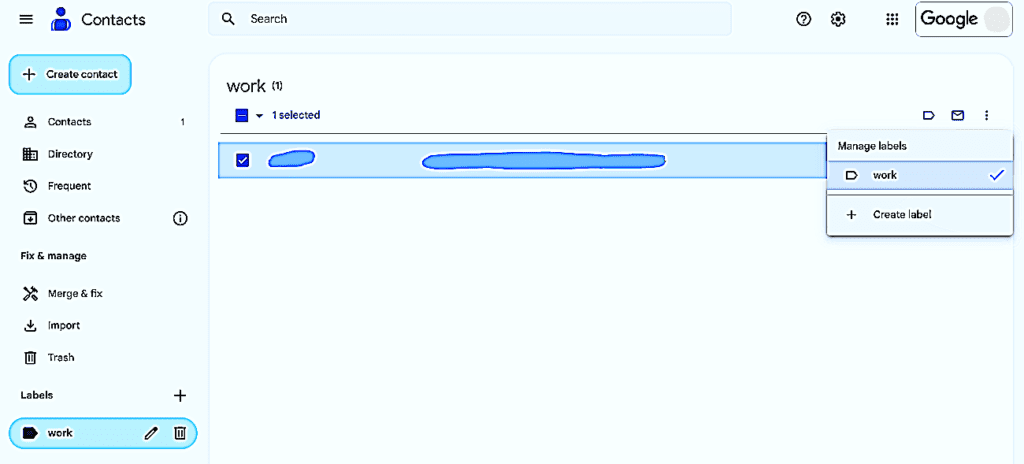
4.Add Contacts to the Label: To add contacts to your distribution list, check the box next to their names. Next, select the label you made by clicking the symbol at the top.
5.Open Gmail and choose “Compose” to start a new email. In the “To” column, type the name of the label you created. All of the contacts will be added immediately, and the distribution list will show up.
Conclusion
Sending emails to a group can be made simple with Gmail by creating a distribution list rather than adding each contact one at a time. You can easily email teams, families, or any other group you need to contact by creating and managing labels in Google Contacts. To streamline your email workflow and maintain contact organization, adhere to these guidelines.

